To install the VRTS System
1. Find a fairly large flat surface upon which to work such as the tailgate of a pickup.
2. Lay out all the VRTS parts for one wheel of your particular brand of rake.
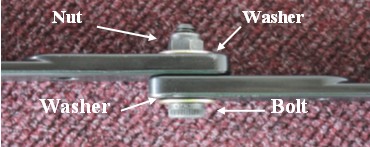
3. Bolt all support straps together, except for the last bolt, using a shoulder bolt, 2 washers and a nut for each connection. Fasten as shown in the illustrations below. Make sure the washer falls over the shoulder bolt or the system will bind up and not work as designed. Important: Each support strap should be bolted top to bottom (see below). After nut is tight on bolt, movement of the straps back and forth in the slotted holes should be possible. If the movement is not possible, check the washers to make sure they are installed past the shoulder on the bolt allowing the nut to tighten against the shoulder.

4. Thread the straps as bolted together onto the rake wheel, one tooth for each hole on the straps. When fully threaded on the wheel, install the last bolt to complete the circle of the support system.
5. Repeat with remaining rake wheels until the system is installed on all wheels.
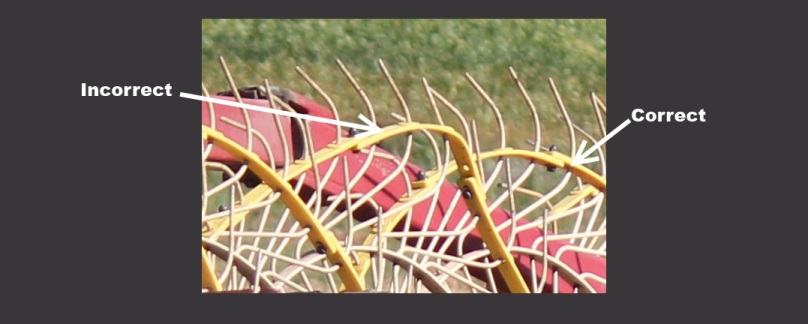
NOTE: If your rake has missing or bent teeth, we recommend that you replace or straighten the teeth before installing the VRTS System. Failure to do this will compromise the effectiveness of the system and may cause unnecessary wear on the VRTS System straps or the teeth. See illustrations below.
Tools Required: 3/16″ Hex End Wrench & 1/2″ Deep Well Socket